Capturing the celestial ballet requires instruments meticulously engineered for both optical precision and photographic adaptability. For aspiring astrophotographers, selecting the right equipment is paramount to translating the subtle nuances of distant galaxies and nebulae into compelling visual narratives. This guide delves into the critical factors that define superior astrophotographic performance, examining how optical design, mount stability, and accessory compatibility directly impact image quality and the overall user experience.
Understanding the intricate relationship between aperture, focal length, and sensor technology is crucial for identifying the best telescopes for photographies. This analysis provides a comprehensive review of leading models, offering insights into their strengths and limitations from a practical, observational, and photographic standpoint. Our objective is to empower enthusiasts with the knowledge to make informed decisions, ensuring their investment unlocks the full potential of their astrophotographic endeavors.
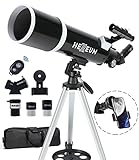
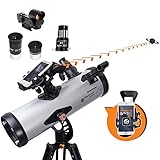
Before we get to our review of the best telescopes for photographies, let’s browse through some relevant products on Amazon:


Last update on 2026-06-12 / #ad / Affiliate links / Images from Amazon Product Advertising API
Analytical Overview of Telescopes for Astrophotography
The field of astrophotography has seen a significant evolution, with telescopes becoming increasingly specialized for capturing stunning celestial images. A key trend is the rise of apochromatic refractors, renowned for their ability to minimize chromatic aberration, producing sharper and more color-accurate images compared to traditional achromatic designs. Similarly, well-corrected Newtonian reflectors with parabolic mirrors are still popular for their aperture-to-cost ratio, offering excellent light-gathering capabilities essential for capturing faint deep-sky objects. The market also shows a growing demand for integrated systems that offer robust mechanics, precise focusing, and compatibility with advanced imaging sensors, catering to both beginner and experienced astrophotographers seeking the best telescopes for photographies.
The primary benefit of utilizing dedicated astrophotography telescopes lies in their optical quality and mechanical stability. Optimized focal ratios, often in the f/5 to f/7 range, strike a balance between fast image acquisition and manageable coma aberration, a common issue in faster optical designs. Furthermore, the increased aperture available in many astrophotography-focused telescopes, with common sizes ranging from 150mm to 230mm, directly translates to superior light-gathering power, enabling the capture of fainter nebulae and galaxies in shorter exposure times. This also reduces the impact of atmospheric seeing conditions, a significant challenge in observational astronomy.
Despite these advancements, several challenges remain. The cost of high-quality astrophotography telescopes can be substantial, with top-tier instruments often exceeding several thousand dollars. Achieving optimal results also necessitates a steep learning curve, involving mastering focusing techniques, understanding guiding systems for long exposures, and processing complex image data. Furthermore, the weight and bulk of larger aperture telescopes, coupled with the need for stable equatorial mounts to track celestial objects accurately, require significant investment in supporting equipment and often a dedicated observing location with minimal light pollution.
Looking ahead, the integration of advanced coatings for enhanced light transmission, improved manufacturing techniques for mirror precision, and the development of integrated electronic focusing systems are likely to continue shaping the landscape of astrophotography telescopes. The trend towards larger sensor sizes in dedicated astronomical cameras also places greater demands on optical correction across the entire field of view, pushing manufacturers to refine designs and deliver instruments that meet the ever-increasing expectations of the astrophotography community.
The Best Telescopes For Photographies
Celestron EdgeHD 1400
The Celestron EdgeHD 1400 is a premium Newtonian reflector telescope designed specifically for advanced astrophotography, boasting a large 14-inch aperture and a proprietary StarBright XLT coating system for exceptional light transmission and contrast. Its aplanatic coma-free optical design ensures sharp stars across the entire field of view, a critical feature for capturing detailed deep-sky objects without the need for expensive coma correctors. The integrated field flattener within the optical tube eliminates the need for separate accessories, simplifying the imaging train and reducing potential sources of error. The telescope’s robust construction, including a heavy-duty focuser and a well-balanced optical tube assembly, provides stability necessary for long exposures, minimizing vibrations that can degrade image quality.
In terms of performance, the EdgeHD 1400 excels at resolving fine details in nebulae and galaxies due to its substantial aperture, offering superior light-gathering capability compared to smaller instruments. Its f/11 focal ratio is well-suited for capturing nebulae and planets without requiring ultra-high magnification, which can be challenging to manage with mounts. The excellent thermal management, often facilitated by its vented optical tube, allows for faster cool-down periods, enabling quicker access to stable imaging conditions. While the initial investment is significant, the integrated features and superior optical quality of the EdgeHD 1400 provide considerable value for serious astrophotographers seeking to capture professional-grade images without the added complexity and cost of separate correction optics.
Meade LX85 ACF 6″ Telescope
The Meade LX85 ACF 6″ is a compelling option for entry-level to intermediate astrophotographers seeking a capable and user-friendly system. Its Advanced Coma-Free (ACF) optical design is a significant advantage, producing sharper images with less off-axis aberration than traditional Newtonian reflectors, thereby reducing the need for additional coma correction accessories and simplifying the optical path. The 6-inch aperture provides a good balance between light-gathering ability for deep-sky objects and manageable focal length for planetary imaging. The ACF optics are known for their excellent contrast and resolution, allowing for the observation and capture of planetary details and brighter deep-sky targets.
The LX85 ACF 6″ is typically paired with Meade’s sturdy LX85 equatorial mount, which offers features such as GoTo capability with a large object database, precise tracking, and the ability to guide for long-exposure astrophotography. The mount’s payload capacity is sufficient for the 6-inch telescope and common imaging accessories like a dedicated astro-camera and guide scope. The overall value proposition of the LX85 ACF 6″ lies in its integrated ACF optics and a capable mount that together provide a solid foundation for developing astrophotography skills without the immediate need for expensive upgrades or extensive optical accessories, making it a strong contender in its price bracket.
Sky-Watcher Esprit 100mm APO Refractor
The Sky-Watcher Esprit 100mm APO Refractor is a premium apochromatic refractor designed for high-performance astrophotography. Its triplet lens design, incorporating FPL-53 ED glass, effectively minimizes chromatic aberration, resulting in exceptionally sharp and color-accurate images. The 100mm aperture and f/5.5 focal ratio offer a wide field of view ideal for capturing large nebulae and star fields, while also providing sufficient light-gathering for detailed planetary imaging. The telescope features a robust and smooth 3″ dual-speed Crayford focuser, crucial for achieving precise focus, especially with high-resolution cameras.
The Esprit 100mm APO is renowned for its excellent optical correction, producing pinpoint stars across the entire field of view without the need for additional flatteners or correctors, simplifying the optical train and reducing potential error sources. The objective lens is multi-coated to maximize light transmission and minimize internal reflections, further enhancing contrast and image quality. The telescope’s build quality is exceptional, with a durable aluminum tube and robust mounting rings, ensuring stability during long imaging sessions. The value of the Esprit 100mm APO is evident in its optical performance and integrated design, providing a high-quality imaging platform that consistently delivers impressive results with minimal fuss.
Explore Scientific ED127CF Apo Triplet Refractor
The Explore Scientific ED127CF Apo Triplet Refractor is a highly regarded apochromatic refractor telescope, distinguished by its 127mm aperture and triplet lens configuration utilizing ED glass. This design is crucial for its exceptional ability to eliminate chromatic aberration, producing pristine images with true color rendition and sharpness that is paramount for detailed astrophotography. The f/7.5 focal ratio offers a moderate focal length, making it versatile for a range of celestial targets, from wide-field nebulae to closer planetary views, while remaining manageable for most equatorial mounts.
The telescope’s optical train is further enhanced by its robust construction and precision-engineered components. It typically features a high-quality Crayford focuser, often with a fine-focus adjustment, which is critical for achieving pinpoint stellar focus with digital imaging sensors. The ED127CF’s optical tube is designed for thermal stability and rigidity, minimizing flexure during long exposures. The value proposition of this telescope lies in its combination of excellent optical quality, built-in aberration correction, and a user-friendly design that simplifies the astrophotography workflow, making it an attractive investment for serious amateurs seeking to produce high-resolution, color-accurate celestial imagery.
William Optics RedCat 61 APO Refractor
The William Optics RedCat 61 APO Refractor is a compact and portable apochromatic refractor specifically engineered for wide-field astrophotography and birding. Its 61mm aperture and f/4.9 focal ratio provide an exceptionally wide field of view, ideal for capturing large nebulae, star clusters, and the Milky Way. The Petzval optical design incorporates four lens elements, including FPL-53 ED glass, which inherently flattens the field of view and corrects for chromatic and other optical aberrations without the need for separate field flatteners. This integrated optical correction simplifies the imaging train and ensures sharp stars across the entire wide field.
The RedCat 61 features a high-quality focuser, often a helical focuser, designed for smooth and precise adjustments, which is crucial for achieving sharp focus with modern imaging cameras. Its lightweight and robust aluminum construction, coupled with a mounting ring that includes a handle and a Vixen-style dovetail, makes it highly portable and easy to integrate into various imaging setups. The value of the RedCat 61 lies in its exceptional portability, integrated field flattening, and superior optical quality at a competitive price point, making it an excellent choice for astrophotographers prioritizing wide-field imaging and ease of use.
The Essential Role of Telescopes in Astrophotography
The pursuit of capturing celestial wonders through photography necessitates specialized equipment, with telescopes often being a crucial investment. While standard cameras and lenses can capture some aspects of the night sky, they possess inherent limitations when attempting to photograph fainter, more distant, or intricately detailed celestial objects. Telescopes, by their design, are engineered to gather significantly more light and provide higher magnification than conventional camera setups. This fundamental difference allows astrophotographers to resolve finer details, capture dimmer objects that would otherwise be invisible, and achieve a level of clarity and resolution that is simply unattainable with everyday photographic gear. Therefore, for those serious about producing high-quality astrophotographs, acquiring a telescope becomes less of an option and more of a necessity to overcome the inherent limitations of standard camera optics when observing the cosmos.
Practical factors play a significant role in the decision to purchase a telescope for astrophotography. The primary practical advantage is light-gathering capability. Telescopes, with their larger apertures, collect substantially more photons from faint celestial objects than camera lenses. This increased light throughput is essential for revealing the subtle colors and intricate structures of nebulae, the delicate features of galaxies, and the faint details on planetary surfaces. Furthermore, telescopes offer superior resolution, allowing for the capture of sharper images with finer detail. This is crucial for differentiating close-together stars or discerning the subtle features of deep-sky objects. Magnification, another key practical consideration, enables astrophotographers to fill the frame with smaller celestial targets, such as distant galaxies or planets, presenting them in a more impactful and detailed manner.
Economically, the need for telescopes for photography is driven by a combination of factors related to achieving specific photographic goals and the longevity of the investment. While the initial cost of a dedicated astrophotography telescope can be significant, it represents a long-term investment in a specialized tool. Unlike consumer-grade camera lenses that may need frequent upgrades to achieve desired results, a well-chosen telescope can serve an astrophotographer for many years, providing a consistent platform for capturing a wide range of celestial subjects. The cost can be justified by the potential to produce unique and high-quality images that stand out, or even contribute to citizen science projects. Moreover, the market offers a range of telescopes at various price points, allowing enthusiasts to find options that align with their budget and commitment level, making it a scalable investment.
The economic rationale also extends to the ongoing pursuit of improved photographic outcomes. As astrophotographers progress, their desire to capture more challenging subjects or achieve greater detail often leads them to seek equipment that surpasses the capabilities of their initial setups. Telescopes, offering distinct optical advantages, become the logical next step in this progression. The investment in a telescope can be seen as a way to unlock new photographic possibilities and elevate the quality of one’s portfolio, potentially leading to recognition or even commercial opportunities for exceptional work. Ultimately, the economic imperative arises from the desire to achieve a certain standard of astrophotographic output, a standard that is often only attainable through the specialized optical performance offered by telescopes.
Understanding Telescope Specifications for Astrophotography
Choosing the right telescope for astrophotography involves deciphering a range of technical specifications that directly impact image quality and usability. Aperture, the diameter of the primary lens or mirror, is paramount. A larger aperture gathers more light, leading to brighter images and the ability to resolve fainter details in celestial objects. This is particularly crucial for nebulae and galaxies, which require significant light-gathering power. However, larger apertures often come with increased cost, weight, and tube length, demanding sturdier mounts and potentially more complex handling. Equally important is the focal length and focal ratio (f-number). A longer focal length provides higher magnification, ideal for planetary imaging, while a shorter focal length and lower f-number (e.g., f/5 or f/6) are generally preferred for deep-sky objects, offering wider fields of view and faster exposures.
The optical design of a telescope also plays a critical role in astrophotography. Refractors, with their sealed optical tubes, are excellent for high-contrast imaging of planets and the moon, minimizing the effects of air currents and dust. However, they can suffer from chromatic aberration (false color) unless high-quality, expensive ED (Extra-low Dispersion) glass is used. Reflectors, such as Newtonian telescopes, offer larger apertures for their price and are generally free from chromatic aberration. However, their open tubes can be susceptible to dust and air currents, and they typically require more frequent collimation (alignment of optical components) to maintain optimal performance. Catadioptric designs like Schmidt-Cassegrains and Maksutov-Cassegrains combine mirrors and lenses to achieve long focal lengths in compact tubes, offering versatility but sometimes introducing their own optical challenges like central obstruction.
Understanding the resolution capabilities of a telescope is also vital. This is often measured in arc-seconds per pixel when combined with a camera. A higher resolution capability allows for finer detail to be captured. Factors influencing resolution include aperture size, optical quality, and the pixel size of the camera sensor. Poor optical quality or an undersized aperture will limit the achievable resolution, regardless of the camera used. Similarly, oversampling (using a camera with pixels that are too small for the telescope’s optics) can lead to diminishing returns and larger file sizes without a proportional increase in detail. Therefore, matching the telescope’s resolving power to the camera’s pixel scale is a key consideration for maximizing image sharpness.
Finally, the mount supporting the telescope is arguably as crucial as the optics themselves, especially for deep-sky astrophotography. A stable and accurate equatorial mount is essential for tracking celestial objects as they move across the night sky. Without proper tracking, stars will appear as trails in long exposures. Features like Go-To capabilities, which automatically slew the telescope to desired celestial targets, and autoguiding ports, which allow a secondary camera to correct for tracking errors, significantly enhance astrophotographic potential. The mount’s payload capacity must also be sufficient to support the weight of the telescope, camera, and any accessories, while maintaining rigidity to prevent vibrations that degrade image quality.
Essential Accessories for Astrophotography
Beyond the telescope itself, a suite of accessories is indispensable for successful astrophotography, transforming a hobby into a sophisticated imaging pursuit. A sturdy and accurate equatorial mount is arguably the most critical accessory, providing the necessary tracking to counteract Earth’s rotation during long exposures. Without it, stars will blur into streaks, rendering most deep-sky images unusable. Motorized tracking and Go-To functionality on these mounts allow for precise alignment and automatic slewing to celestial objects, vastly improving efficiency and the ability to capture fleeting astronomical events. The payload capacity of the mount must also be carefully considered to ensure stability with the combined weight of the telescope, camera, and other imaging equipment.
When it comes to capturing light, a dedicated astrophotography camera is a significant upgrade from a standard DSLR or mirrorless camera. These cooled CMOS or CCD cameras are designed for low-light sensitivity, minimizing thermal noise during long exposures, a crucial factor for revealing faint details in nebulae and galaxies. They often feature larger pixels optimized for collecting photons and can be sensitive to specific wavelengths of light, allowing for specialized narrowband imaging that isolates the emission from hydrogen-alpha, oxygen-III, and sulfur-II gases. Selecting a camera with appropriate pixel size to match the telescope’s focal length is vital for achieving optimal resolution without undersampling or oversampling.
Filters are another indispensable category of accessories for astrophotography. Light pollution filters, for instance, are essential for urban or suburban astronomers, as they block specific wavelengths of artificial light, thereby improving the contrast of celestial objects against a brighter sky. For deep-sky imaging, narrowband filters (e.g., H-alpha, OIII, SII) are invaluable for capturing the intricate details and colors of emission nebulae, allowing astronomers to isolate and highlight specific chemical elements within these cosmic clouds. Color imaging filters, used in conjunction with monochrome cameras, allow for the creation of vibrant, natural-looking color images by capturing different spectral bands separately.
Finally, a robust image acquisition and processing workflow requires specific software. Planetarium software, such as Stellarium or Starry Night, aids in planning observing sessions and locating targets. Autoguiding software, like PHD2, works in conjunction with an autoguiding camera and mount to make real-time corrections to tracking errors, ensuring sharp star images. For processing, powerful software suites like PixInsight, DeepSkyStacker, and Adobe Photoshop are used to stack multiple exposures, calibrate images, reduce noise, enhance contrast, and bring out the subtle details captured by the telescope and camera. Mastering this software is as important as mastering the hardware.
Deep Sky Object Photography Techniques
Capturing the grandeur of deep-sky objects (DSOs) like nebulae and galaxies demands specific techniques that go beyond simple point-and-shoot photography. The core principle is the accumulation of light over extended periods. Unlike terrestrial photography, where exposures might be fractions of a second, astrophotography of DSOs often involves stacking hundreds of individual sub-exposures, each ranging from several seconds to several minutes. This process, known as image stacking or integration, dramatically increases the signal-to-noise ratio, revealing faint details and colors that would be imperceptible in a single exposure. Calibration frames, including dark frames (exposures with the lens cap on), bias frames (short, high-ISO exposures), and flat frames (exposures of a uniformly illuminated surface), are crucial for removing sensor noise, hot pixels, and vignetting, thereby producing cleaner and more accurate final images.
Narrowband imaging is a specialized but highly effective technique for capturing emission nebulae, which are rich in specific ionized gases. By using filters that transmit only narrow bands of light, such as hydrogen-alpha (Hα), oxygen-III (OIII), and sulfur-II (SII), astronomers can isolate the light emitted by these elements. This method significantly reduces the impact of light pollution and allows for the creation of false-color images by assigning different colors to each narrowband channel. For instance, the Hubble Palette commonly maps SII to red, Hα to green, and OIII to blue, resulting in striking images that highlight the chemical composition and structure of nebulae in ways that broadband color imaging cannot.
Wide-field astrophotography offers a different perspective on the cosmos, capturing vast swathes of the Milky Way, star clusters, and larger nebulae. This often involves using refractor telescopes with short focal lengths and fast f-ratios, paired with sensitive cameras, potentially even modified DSLRs or mirrorless cameras. The goal here is to capture as much sky as possible, emphasizing the scale and beauty of celestial panoramas. Careful planning to include interesting foreground elements can further enhance these images, creating a sense of depth and connection between the earthly and the celestial.
Finally, managing tracking accuracy and guiding is paramount for sharp DSO images. Even with a good equatorial mount, minute errors in tracking can cause stars to appear slightly elongated in long exposures. Autoguiding systems, consisting of a guide scope or an off-axis guider and a dedicated guide camera, coupled with specialized software, detect these tracking errors and send corrective signals to the mount. This process ensures that the telescope remains precisely locked onto the target throughout the entire imaging session, allowing for the longest possible sub-exposures and the highest level of detail in the final stacked image.
Planetary Imaging and Processing Techniques
Planetary imaging, while often overlooked in favor of deep-sky astrophotography, offers its own unique challenges and rewards, focusing on capturing the details of our solar system’s closest celestial bodies. Unlike the long exposures required for nebulae, planetary imaging typically utilizes short, high-frame-rate video captures. This approach is effective because planets are relatively bright, and the rapid capture helps freeze atmospheric turbulence (seeing), a major obstacle for clear planetary views from Earth. Using a high-magnification eyepiece and a planetary imager (often a high-frame-rate CMOS camera with small pixels) allows for the capture of many individual frames, each containing a snapshot of the planet’s surface during a moment of relatively stable atmospheric conditions.
The processing of planetary videos is a multi-stage, analytical process focused on extracting the maximum detail from these captured frames. The first crucial step is “stacking,” where specialized software identifies the sharpest frames from the video sequence. Algorithms analyze the sharpness of the planet within each frame, and a user-defined percentage of the best frames are selected. These selected frames are then precisely aligned, often frame by frame or by tracking features on the planet’s surface, before being averaged together. This averaging process significantly reduces noise and sharpens the retained detail, effectively simulating a longer, more stable exposure.
Following the stacking process, further sharpening and enhancement techniques are applied to reveal finer surface features. “Deconvolution” is a common algorithm used to reverse the blurring effects of diffraction and atmospheric seeing. Wavelet analysis is another powerful technique that breaks down the image into different frequency components, allowing for targeted sharpening of specific features at various scales. This enables the enhancement of delicate cloud bands on Jupiter, the polar ice caps on Mars, or the rings of Saturn without introducing overwhelming artifacts. Careful application of these techniques is essential to avoid over-processing, which can lead to unnatural-looking images.
Color planetary imaging involves capturing different color channels separately, usually through the use of Red, Green, and Blue (RGB) filters. Each filter is used to capture a separate video of the planet, and these individual monochrome captures are then aligned and combined in processing software to create a full-color image. This approach is more accurate than relying on a Bayer filter (common in many cameras) for color separation and allows for fine-tuning of color balance. The success of planetary imaging hinges on a combination of good equipment, excellent seeing conditions, and meticulous processing to overcome atmospheric limitations and bring out the subtle beauty of our planetary neighbors.
The Pursuit of Celestial Imagery: A Buyer’s Guide to the Best Telescopes for Photography
The allure of capturing the cosmos, transforming faint starlight into tangible images, has captivated astronomers and photographers alike. However, the journey from observing the night sky to producing stunning astrophotographs is inherently technical, demanding specific equipment tailored to the unique challenges of capturing extended exposure images of celestial objects. Unlike visual astronomy, where light-gathering power and magnification are paramount, astrophotography imposes a different set of priorities. Factors such as optical quality, tracking accuracy, and the telescope’s compatibility with imaging equipment become critical determinants of success. This guide aims to demystify the selection process for aspiring astrophotographers, analyzing the crucial features that distinguish superior instruments for capturing the night sky. We will delve into the six most impactful considerations, providing data-driven insights to equip you with the knowledge to acquire the best telescopes for photographies, enabling you to translate your celestial visions into breathtaking imagery.
1. Aperture and Focal Length: The Foundation of Detail and Reach
The aperture, the diameter of the primary lens or mirror, directly correlates with a telescope’s light-gathering ability and its potential for resolving fine detail. For astrophotography, a larger aperture is generally preferred as it allows more photons to reach the camera sensor in a given exposure time. For instance, a 6-inch (150mm) Newtonian reflector can gather approximately 45% more light than a 5-inch (127mm) equivalent. This increased light-gathering is crucial for capturing faint nebulae and galaxies, reducing the need for excessively long exposures which can exacerbate tracking errors and introduce noise. However, aperture is not the sole determinant. Focal length plays an equally vital role, dictating the magnification and the field of view. A longer focal length, coupled with a larger aperture, yields higher resolution and the ability to capture smaller, more distant objects like planetary details or globular clusters. For example, a telescope with a focal length of 1000mm will present a much more magnified view of the Moon than a 500mm scope, allowing for the capture of finer crater details. Conversely, shorter focal lengths are better suited for wide-field imaging of nebulae and star fields.
The interplay between aperture and focal length is often expressed as the focal ratio (f-number), calculated by dividing the focal length by the aperture (e.g., a 1000mm focal length telescope with a 200mm aperture has an f/5 focal ratio). Lower focal ratios (f/4 to f/6) are generally preferred in astrophotography as they offer faster “capture rates,” meaning shorter exposure times are needed to achieve a well-exposed image. This is particularly advantageous when imaging dimmer objects or when working with less sensitive camera sensors. For instance, an f/5 telescope will require roughly half the exposure time to achieve the same level of brightness as an f/10 telescope with the same aperture, assuming comparable optical quality. However, lower focal ratio systems can be more susceptible to optical aberrations like coma, which can distort stars at the edges of the field of view. Therefore, selecting a telescope with well-corrected optics for its focal ratio is paramount to avoid frustrating image degradation.
2. Optical Design: Refractor vs. Reflector vs. Catadioptric
The three primary optical designs for telescopes – refractors, reflectors, and catadioptric – each present distinct advantages and disadvantages for astrophotography. Refractors, which use lenses to bend light, are renowned for their sharp, high-contrast images and are generally maintenance-free. However, chromatic aberration, a phenomenon where different colors of light do not focus at the same point, can be an issue in simpler achromatic refractors, leading to color fringing around bright objects. Apochromatic (APO) refractors, employing extra low-dispersion (ED) glass or fluorite elements, significantly reduce chromatic aberration, providing superior color fidelity essential for capturing the vibrant hues of nebulae. For example, an APO refractor might exhibit less than 0.5% chromatic aberration across the visible spectrum, compared to 2-3% in a basic achromat. Reflector telescopes, which use mirrors, are often more affordable per inch of aperture and are free from chromatic aberration. However, they can suffer from obstruction caused by the secondary mirror, which can slightly reduce contrast and introduce diffraction spikes. Newtonian reflectors are popular for their light-gathering capabilities but require occasional collimation (alignment of mirrors) and can be susceptible to dew formation on the primary mirror.
Catadioptric telescopes, such as Schmidt-Cassegrains (SCTs) and Maksutov-Cassegrains (MCSTs), combine lenses and mirrors to create a compact optical tube with a long focal length. This makes them highly portable and ideal for imaging smaller, high-magnification targets. SCTs, for instance, offer a long focal length in a relatively short tube, making them versatile for both planetary and deep-sky imaging. However, their central obstruction can be larger than in some reflectors, and they are generally more expensive. MCSTs typically have a smaller central obstruction than SCTs and excellent thermal stability, but their longer focal ratios can make them less suitable for very faint deep-sky objects. When choosing the best telescopes for photographies, consider the types of objects you intend to image. Refractors excel at wide-field and nebulae imaging due to their color correction, while reflectors offer excellent value for their aperture and are good for brighter deep-sky objects and clusters. Catadioptrics provide long focal lengths in portable packages, ideal for planets and the Moon.
3. Mount Stability and Tracking Accuracy: The Cornerstone of Sharp Images
For astrophotography, the mount is arguably as crucial as the telescope itself. A stable mount that can accurately track the apparent motion of celestial objects across the sky is essential for capturing sharp, un-blurred images during long exposures. This apparent motion is due to the Earth’s rotation, and without precise tracking, stars will appear as streaks instead of points of light. Equatorial mounts are the standard for astrophotography because they are designed to align with the Earth’s rotational axis, allowing them to track celestial objects with a single axis of movement (the Right Ascension axis). German Equatorial Mounts (GEMs) are the most common type, offering robust construction and precise adjustments. The mount’s payload capacity, the maximum weight of the telescope and accessories it can comfortably support without compromising tracking, is a critical specification. A mount rated for 30 lbs can effectively handle a 20-25 lb optical tube assembly, leaving room for cameras, guide scopes, and other accessories. Exceeding this limit will significantly degrade tracking performance.
The accuracy of a mount’s tracking is often measured by its “periodic error,” the slight inaccuracies in its worm gear mechanism that cause periodic deviations from perfect tracking. High-quality mounts have very low periodic error, often below 5 arc-seconds, while less expensive mounts might have errors exceeding 15 arc-seconds. This error can be corrected through a process called “guiding,” where a separate camera and software monitor a guide star and send corrective signals to the mount. However, a mount with inherently good tracking reduces the reliance on and complexity of guiding. For truly critical imaging, mounts with “periodic error correction” (PEC) capabilities can learn and compensate for these errors, further improving tracking. When evaluating the best telescopes for photographies, invest in a mount that can handle your optical tube’s weight with a generous margin and offers excellent tracking accuracy. A highly accurate mount, even with a slightly smaller aperture telescope, will often yield better photographic results than a larger telescope on an unstable, poorly tracking mount.
4. Backfocus and Accessory Compatibility: Integrating Your Imaging Chain
The “backfocus” of a telescope refers to the distance between the focal plane (where the image is formed) and the mounting threads for accessories like cameras, filter wheels, and autoguiders. This is a critical, often overlooked, factor in astrophotography because different imaging accessories have varying physical lengths. For example, a DSLR camera with its battery pack and card requires more backfocus than a dedicated astronomy camera. Similarly, the addition of a coma corrector or field flattener, which are essential for achieving sharp stars across the entire field of view with many telescope designs, can consume valuable backfocus. A telescope that offers ample and adjustable backfocus, perhaps through a focuser with a long drawtube or a robust helical focuser, provides greater flexibility in assembling your imaging train. For instance, a refractor with a Crayford focuser that offers 2 inches (50mm) of travel and can be extended with spacer rings might provide 7 inches (175mm) of backfocus, accommodating a wider range of cameras and accessories.
Furthermore, the telescope’s focuser mechanism itself is a vital consideration. For astrophotography, a precise and stable focuser is paramount for achieving critical focus. Rack-and-pinion focusers, common on older or less expensive telescopes, can be prone to slipping under the weight of imaging equipment. Crayford focusers, which use a roller bearing system, offer smoother and more precise focusing, and often include a fine-focus knob with a 1:10 gear ratio for ultra-fine adjustments. Some advanced focusers also incorporate temperature compensation or are remotely controllable for automated focusing routines. When selecting the best telescopes for photographies, ensure the focuser can securely hold your camera and accessories, offers smooth and repeatable movement, and provides sufficient backfocus to accommodate your intended imaging setup. The ability to easily integrate your camera, filters, and guiding system without compromise is fundamental to a successful astrophotography workflow.
5. Integrated Cooling and Thermal Stability: Minimizing Image Degradation
The performance of a telescope’s optics can be significantly affected by temperature changes. As the telescope tube heats up or cools down, air currents within the tube can refract light unevenly, leading to distorted images and reduced sharpness. This is particularly problematic during long exposure astrophotography when the telescope might be set up in a rapidly changing ambient temperature environment. Refractor telescopes, especially those with larger aperture achromatic designs, are more susceptible to these effects due to their enclosed optical tube. Reflector telescopes, with their open tubes, tend to equalize temperature more quickly with the surroundings. Catadioptric designs, with their sealed tubes and corrector plates, can be slow to reach thermal equilibrium, but once they do, they tend to be more stable. However, some designs incorporate features like ventilation fans to accelerate cooling and improve thermal stability. For example, a telescope equipped with a dedicated cooling fan system can bring its internal temperature closer to ambient within 30-60 minutes, significantly reducing tube currents.
The impact of thermal instability on astrophotography can manifest as reduced contrast, fuzzy star images, and even wavy distortions across the field of view. For instance, a telescope that hasn’t thermally stabilized might show star shapes that are noticeably non-circular, particularly at the edges of the frame. While this effect can be partially mitigated through post-processing, it’s always preferable to start with the cleanest possible data. Therefore, when considering the best telescopes for photographies, look for instruments known for their thermal stability, or those that offer features like built-in cooling fans. If you plan on imaging in environments with significant temperature fluctuations, prioritizing thermal management in your telescope choice will contribute significantly to the overall quality of your celestial images.
6. Portability and Ease of Setup: Maximizing Your Imaging Time
While optical performance and tracking accuracy are paramount, the practical considerations of portability and ease of setup cannot be understated for astrophotography. The more convenient a telescope is to transport, set up, and align, the more time you will be able to dedicate to actual imaging. Large, heavy telescopes and mounts, while offering superior performance, can become burdensome and require significant effort for setup and alignment, potentially cutting into valuable observing time. For example, a large Dobsonian telescope, while an excellent visual instrument, is often unwieldy for astrophotography due to its alt-azimuth mount and lack of precise tracking capabilities without modifications. Conversely, a well-built refractor in the 70mm to 100mm aperture range, mounted on a solid but portable equatorial mount, can be set up and aligned within 15-20 minutes, allowing for more efficient use of clear nights.
The design of the telescope’s mount and its ease of polar alignment – the process of aligning the mount’s axis with the Earth’s rotational axis – are also critical. Mounts with illuminated polar scopes or digital polar alignment aids can significantly speed up this process, especially for beginners. Furthermore, the overall weight and size of the optical tube assembly and mount will influence your ability to transport it to darker skies away from light pollution. Consider your physical capabilities and the logistics of transporting your equipment to your preferred observing locations. Ultimately, the best telescopes for photographies are not just those with the most impressive specifications, but those that fit your lifestyle and allow you to consistently capture images of the night sky. A balance between optical prowess, tracking capability, and user-friendliness is key to a rewarding astrophotography experience.
Frequently Asked Questions
What makes a telescope good for astrophotography compared to visual astronomy?
For astrophotography, a telescope’s suitability is primarily determined by its ability to capture detailed, well-exposed images of celestial objects, which is a different set of priorities than visual astronomy. Key factors include a stable mount capable of tracking celestial objects accurately over long periods, minimizing image blur from Earth’s rotation. Aperture (the diameter of the main lens or mirror) remains important for light-gathering, but the quality of the optics, specifically how well they are corrected for aberrations like chromatic aberration (color fringing) and spherical aberration, becomes paramount. Astrophotography demands optics that produce sharp, flat fields of view across the entire sensor, whereas visual astronomy can tolerate minor optical imperfections that are less noticeable to the human eye.
Furthermore, a telescope’s focal length and focal ratio play a crucial role in astrophotography. A longer focal length generally provides higher magnification, allowing for the capture of finer details on planets or smaller deep-sky objects, but it also requires a more robust mount to counteract vibrations and can lead to narrower fields of view. The focal ratio (focal length divided by aperture diameter) dictates the “speed” of the telescope for imaging; a lower f-number (faster focal ratio) means shorter exposure times are needed, which is beneficial for capturing faint objects and reducing the impact of atmospheric turbulence. For example, a telescope with an f/5 focal ratio will expose four times faster than an f/10 telescope of the same aperture, making it more efficient for capturing detail in nebulae or galaxies.
What are the essential features to look for in a telescope mount for astrophotography?
The cornerstone of successful astrophotography is a highly stable and accurate tracking mount. For deep-sky astrophotography, an equatorial mount is essential. These mounts are designed to align with the celestial pole, allowing them to track the apparent motion of stars with a single axis of movement (the Right Ascension axis). This precise tracking is critical for long exposures, which are often needed to capture faint details in nebulae and galaxies, preventing star trailing. Look for mounts with a high payload capacity that significantly exceeds the weight of your telescope and accessories to ensure stability and minimize flexure.
Beyond stability, the mount’s tracking accuracy, measured in arcseconds per hour, is paramount. A good astrophotography mount should have very low periodic error (PE), which is the inherent mechanical inaccuracy in the drive system. High-end mounts often feature built-in autoguiding ports, allowing a separate guide camera and software to make real-time corrections to the mount’s tracking, further refining accuracy to sub-arcsecond levels. Features like GoTo capabilities, which automatically slew the telescope to programmed celestial objects, and polar alignment aids, which simplify the crucial process of aligning the mount with the celestial pole, significantly enhance the user experience and the quality of the resulting images.
How does aperture affect astrophotography results, and what is the optimal aperture range?
Aperture, the diameter of the telescope’s primary lens or mirror, directly influences its light-gathering capability. In astrophotography, this translates to the ability to capture fainter objects and to do so with shorter exposure times. A larger aperture collects more photons, resulting in brighter and more detailed images, especially for nebulae, galaxies, and star clusters. For instance, a 6-inch (150mm) telescope will gather four times more light than a 3-inch (75mm) telescope, allowing for significantly deeper exposures or shorter exposures for the same level of detail.
The “optimal” aperture range is highly dependent on the specific types of celestial objects you aim to photograph and your budget and portability considerations. For entry-level deep-sky astrophotography, apertures between 4-8 inches (100-200mm) are commonly recommended. These provide a good balance of light-gathering power and manageable size and weight. As you progress, larger apertures, such as 8-12 inches (200-300mm), offer substantial improvements in capturing fainter details and resolving finer structures on objects like planetary nebulae and galaxies. However, larger apertures also necessitate heavier and more robust mounts, increase costs, and can be more challenging to transport and set up.
What is focal length and focal ratio, and how do they impact astrophotography?
Focal length, the distance from the telescope’s optical center to the focal point where light converges, directly determines the magnification and the field of view. In astrophotography, a longer focal length (e.g., 1000mm or more) provides higher magnification, making it ideal for capturing detailed views of planets, the Moon, and smaller deep-sky objects like planetary nebulae. However, longer focal lengths also result in narrower fields of view, meaning you capture a smaller portion of the sky, and they demand more stable mounts to counteract vibrations and tracking errors.
The focal ratio (f-number), calculated by dividing the focal length by the aperture diameter, is a measure of the telescope’s “speed” for imaging. A lower f-number (e.g., f/4 or f/5) is considered “faster” and allows for shorter exposure times, which is highly beneficial for capturing faint objects and minimizing the impact of atmospheric turbulence or guiding errors. For example, an f/5 telescope will require half the exposure time of an f/10 telescope of the same aperture to achieve the same image brightness. Conversely, higher f-numbers (e.g., f/8 or f/10) provide higher magnification naturally but require longer exposure times. Thus, a common compromise for general deep-sky astrophotography is a telescope with a focal ratio between f/4 and f/7.
What type of telescope optical design is best for astrophotography (refractor, reflector, catadioptric)?
Each optical design offers distinct advantages and disadvantages for astrophotography. Refractors, which use lenses, are renowned for their sharp, high-contrast images and are generally free from coma and chromatic aberration when well-corrected (apochromatic refractors are best). They are excellent for capturing nebulae and wide-field starscapes. However, larger aperture refractors can be very expensive and prone to chromatic aberration if they are not apochromatic designs.
Reflectors, which use mirrors, are more cost-effective for larger apertures, providing superior light-gathering capabilities for fainter objects and galaxies. Newtonian reflectors are popular for their affordability and performance at larger sizes. However, they can suffer from coma, an aberration that causes stars at the edge of the field to appear stretched, which can be mitigated with a coma corrector. Catadioptric telescopes, such as SCTs (Schmidt-Cassegrains) and Maksutov-Cassegrains, offer a compact design with long focal lengths, making them versatile for both planetary and deep-sky imaging. They have fewer optical aberrations than simple reflectors but can be more expensive and may have a central obstruction that slightly reduces contrast compared to a refractor of similar aperture.
How important is image stabilization or vibration reduction in astrophotography telescopes?
Image stabilization or vibration reduction is not a feature typically found within the telescope itself in the way it is in consumer cameras. Instead, the equivalent and far more critical concept in astrophotography is the stability of the mount and the system as a whole. Earth’s rotation means that celestial objects appear to move across the sky at a predictable rate. For long exposures – which are essential for capturing faint details in nebulae and galaxies – the telescope must track this movement with extreme precision. Any vibration, from wind, ground tremors, or even internal mount mechanics, will cause star trailing, blurring the image and significantly degrading its quality.
Therefore, the focus in astrophotography is on a robust, well-balanced, and accurately polar-aligned mount. This is often achieved through features like sturdy construction, high-quality motor drives, and precise gear systems. Additionally, techniques like autoguiding, where a separate camera monitors a guide star and sends minute correction signals to the mount, are used to counteract even the smallest tracking errors. The goal is to keep the telescope pointing at the exact same spot in space for the duration of the exposure, a feat impossible without a stable platform and precise tracking.
What are the key optical aberrations to be aware of, and how do they affect astrophotography?
Several optical aberrations can degrade astrophotography images, and understanding them is crucial for selecting the right equipment. Chromatic aberration causes different colors of light to focus at slightly different points, resulting in color fringing around bright objects. This is particularly noticeable in refractors that are not apochromatic. Coma causes stars away from the center of the field of view to appear comet-shaped, which is common in Newtonian reflectors and some other designs. Spherical aberration occurs when light rays hitting the edge of a lens or mirror do not focus at the same point as rays hitting the center, leading to a less sharp overall image.
Astigmatism causes out-of-focus points of light to appear elongated in one direction. Field curvature means that the focal plane is not flat, causing stars at the edge of the image to be out of focus while those in the center are sharp, or vice versa. These aberrations are detrimental in astrophotography because digital sensors capture every detail, and even minor optical imperfections become readily apparent and difficult to correct in post-processing. Consequently, telescopes specifically designed for astrophotography are often engineered with advanced optical corrections (e.g., apochromatic designs, built-in flatteners/reducers) to minimize these issues, ensuring sharp stars and flat fields across the entire sensor.
Final Thoughts
Selecting the best telescopes for photography necessitates a careful evaluation of optical quality, mount stability, and sensor compatibility. High-quality optics, characterized by minimal chromatic aberration and excellent light-gathering capabilities, are paramount for capturing sharp, detailed celestial images. The mount, whether equatorial or alt-azimuth with advanced tracking, plays a critical role in compensating for Earth’s rotation, enabling long exposures without star trailing. Furthermore, understanding the telescope’s aperture and focal length relative to desired imaging targets – whether deep-sky objects or planetary details – is crucial for achieving optimal results and avoiding sensor saturation or undersampling.
Ultimately, the ideal telescope for astrophotography is a synergistic combination of precision optics, a robust and accurate tracking system, and appropriate sensor integration. The reviews and buying guide presented underscore the importance of matching these components to individual photographic goals and budget constraints. While a higher aperture generally offers greater light-gathering and detail, it often comes with increased cost and complexity. Equally vital is the mount’s payload capacity and tracking precision, which directly impact the quality and duration of usable exposures.
Based on the analysis of various models, a Dobsonian telescope with a high-quality parabolic mirror, paired with a motorized tracking upgrade, presents a compelling entry point for aspiring astrophotographers seeking a balance between optical performance and affordability. For those with a larger budget and a focus on deep-sky astrophotography requiring longer focal lengths and precise tracking, a refractor telescope (apochromatic or ED glass) mounted on a sturdy equatorial mount emerges as the superior choice, offering exceptional color correction and stability.